
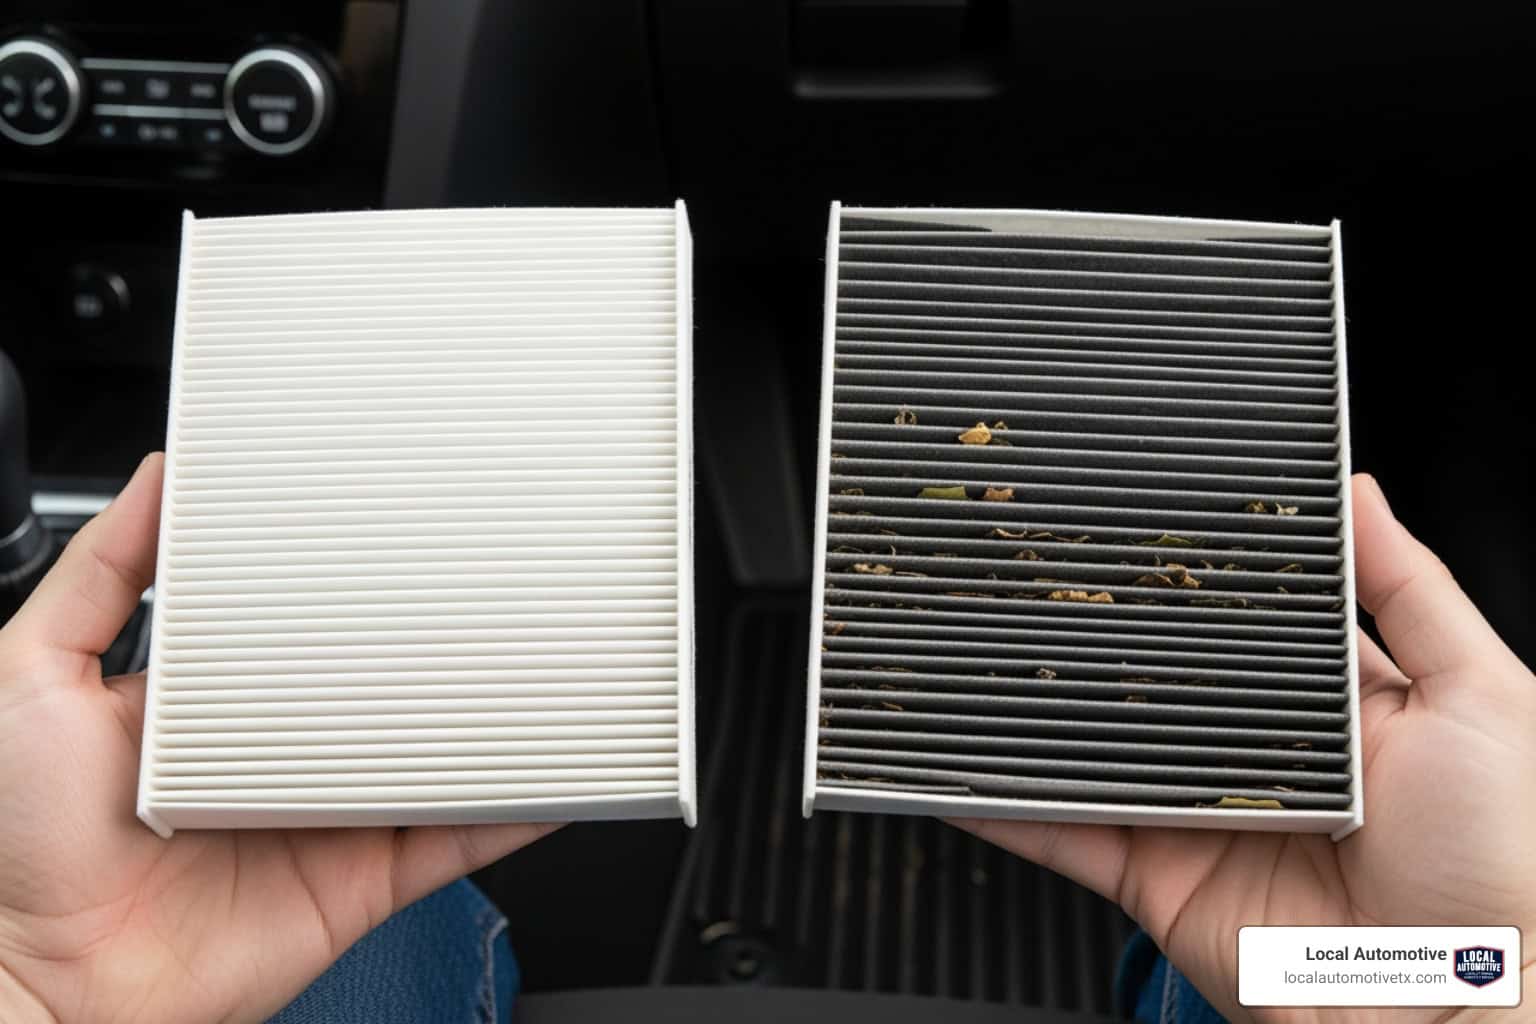
Cabin air filter replacement is a simple maintenance task that keeps the air inside your vehicle clean and your HVAC system running efficiently, which is why Buda cabin air filters are important. Here's what you need to know:
Quick Answer: Cabin Air Filter Replacement Basics
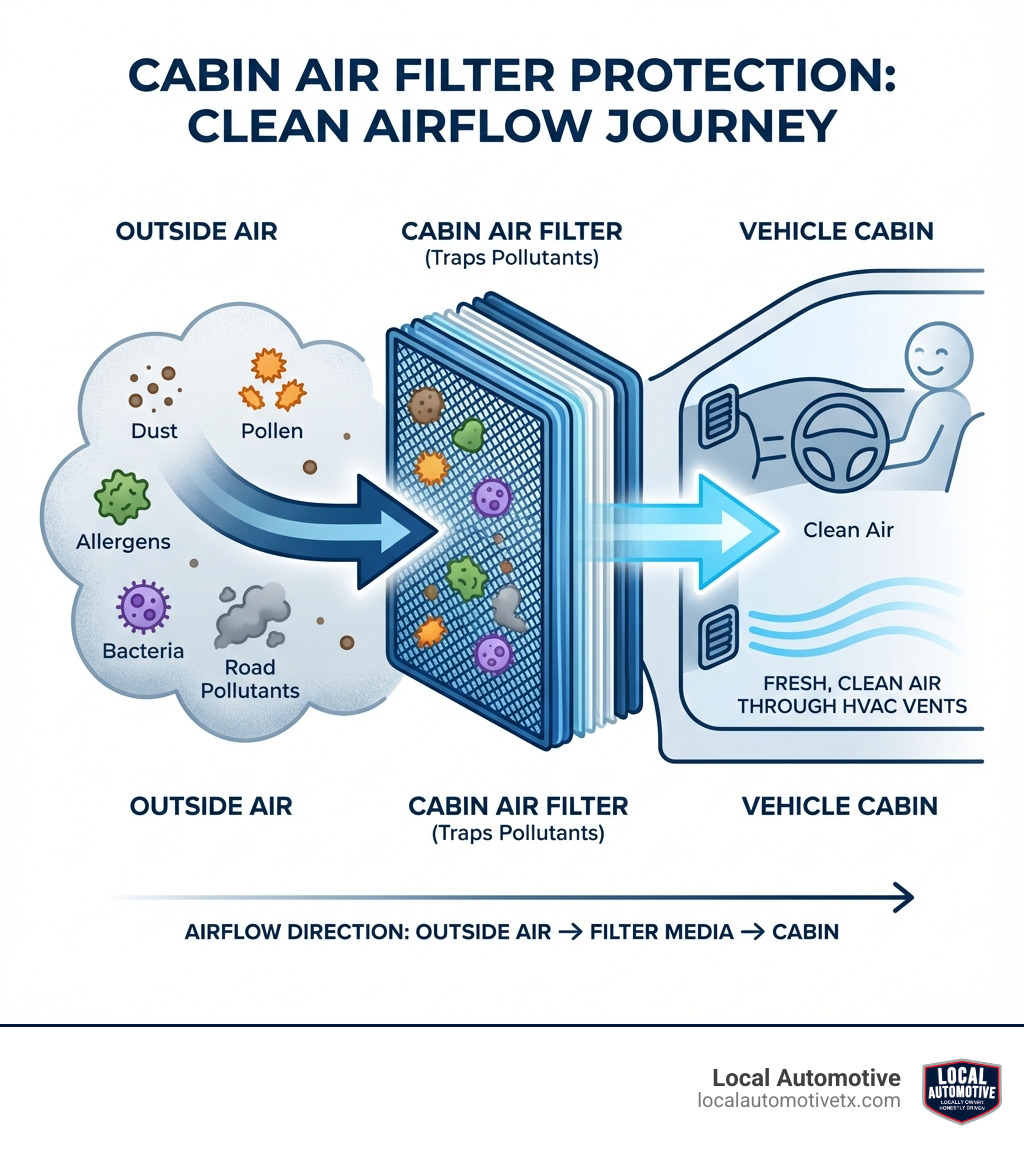
- What it does: Traps dust, pollen, pollutants, and allergens before they enter your car's interior
- When to replace: Every 12,000-15,000 miles or annually (more often in dusty/polluted areas)
- Warning signs: Reduced airflow from vents, musty odors, or loud fan noises
- Typical cost: $12-30 for the filter; DIY takes 5-15 minutes
- Common location: Behind the glove box, under the dashboard, or under the hood
Think of your cabin air filter as your car's lungs. Just like you wouldn't want to breathe through a dirty mask, your vehicle struggles when its filter gets clogged with debris, making HVAC maintenance in Buda TX a good idea.
Has the inside of your vehicle started to smell musty? Maybe you've noticed weak airflow even when the fan is on high? These are telltale signs your cabin air filter needs attention.
Your cabin air filter does important work every time you drive. It protects you and your passengers by removing dust, pollen, and harmful pollutants before they reach the vehicle's cabin. According to research, quality cabin air filters can keep up to 98% of road dust and pollen particles from entering your vehicle.
But here's what many shops won't tell you upfront: this is one of the easiest maintenance tasks you can do yourself. No hidden fees, no unnecessary upsells—just a straightforward job that takes about 10 minutes once you know where to look.
Whether you choose to tackle this yourself or have a trusted professional handle it, understanding the process helps you make informed decisions about your vehicle's care.
When to Replace Your Filter: Key Signs and Timelines
One of the most common questions we hear is, "How often should I replace my cabin air filter?" The answer isn't always a simple one-size-fits-all, but we can give you some clear guidelines and tell-tale signs to look out for.
Generally, it's recommended to change your cabin air filter annually or every 12,000 miles (approximately 20,000 km). Some manufacturers might suggest intervals up to 15,000 or even 30,000+ miles, so it's always a good idea to check your vehicle's owner's manual for the specific recommendation. For example, Tesla recommends replacing their cabin filters every 2 years for most models.
However, these are just general guidelines. Your driving environment plays a huge role. If you live in or frequently drive through heavily polluted areas, dusty construction zones, or on dirt roads, we recommend changing your cabin air filter more frequently—perhaps every 5,000 miles or 10,000 km. Think of all the dust and pollen that blows around Hays County, TX, especially during allergy season! More frequent changes can significantly improve the air you breathe inside your car.
Beyond mileage and time, your car will often give you clear signals that its "lungs" are struggling. Here are the key signs that a cabin air filter needs to be replaced:
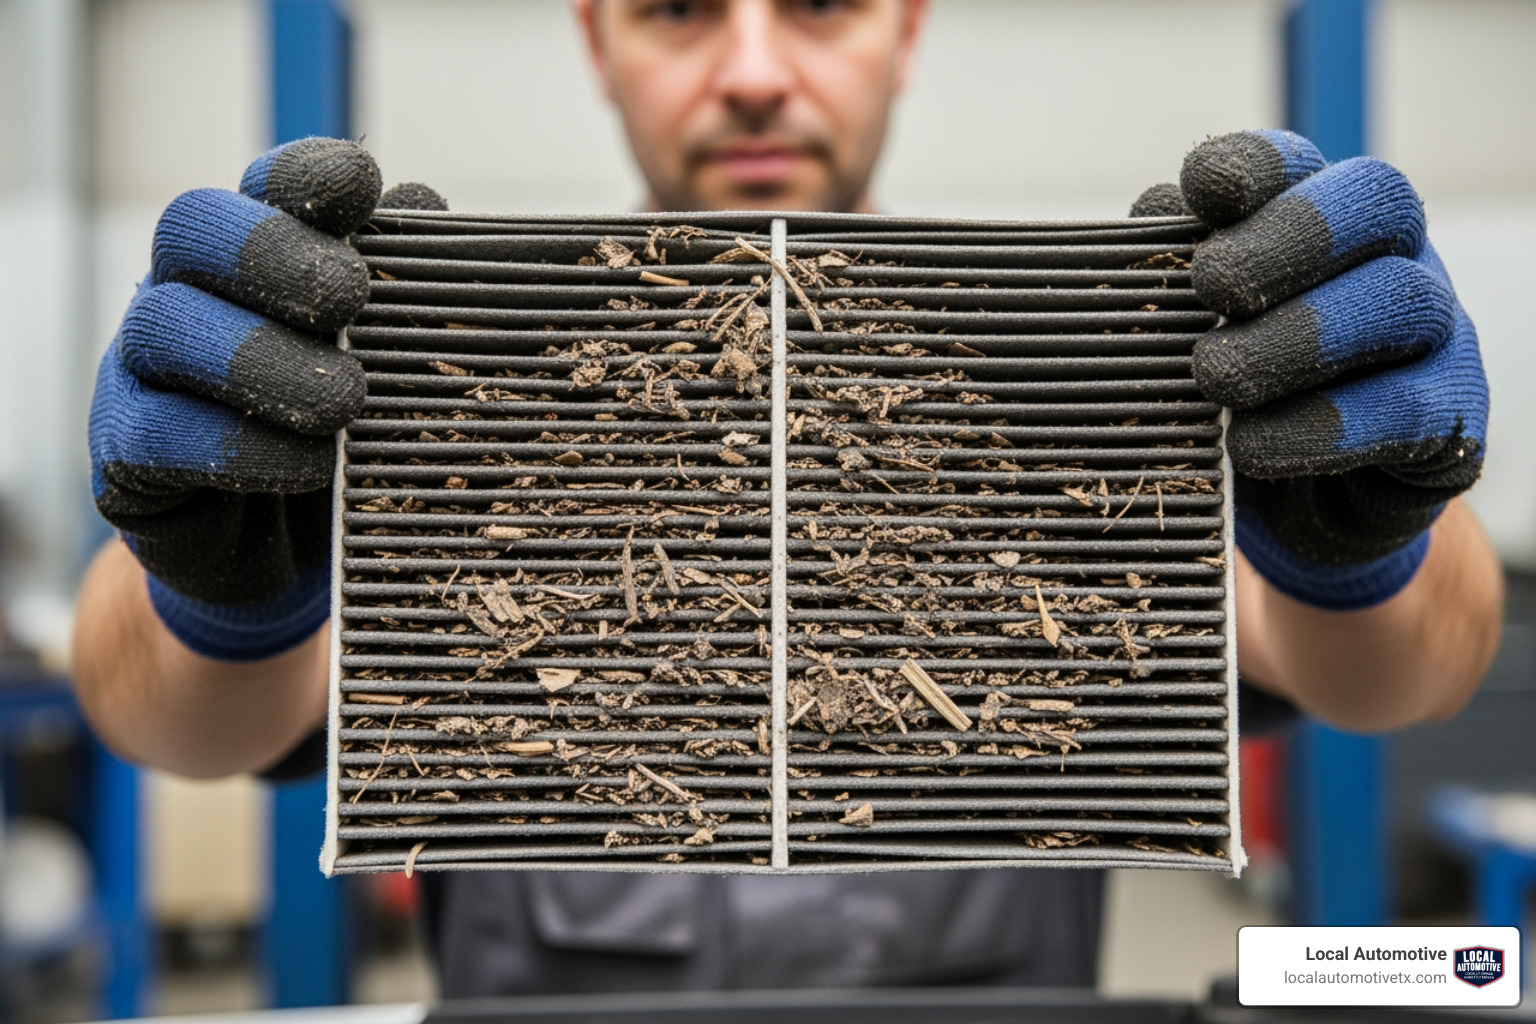
- Reduced Airflow: If you turn on your AC or heater and the air coming out of the vents seems weak, even on a high fan setting, a clogged filter is a likely culprit. The filter gets so packed with debris that air can't pass through effectively.
- Musty or Stale Odors: Does your car smell a bit funky, especially when the climate control is on? A dirty filter can harbor mold, mildew, and bacteria, leading to unpleasant, musty odors permeating your cabin. Our research shows that Champion filters, for instance, use carbon-improved media for maximum odor control, highlighting how much filters impact smells.
- Unusual Fan Noises: When the HVAC fan has to work harder to push air through a clogged filter, it can create excessive noise. You might hear rattling, whistling, or a straining sound, particularly when the fan speed is turned up high. This extra strain can also impair the performance of your AC system over time.
- Increased Dust in the Cabin: If you notice more dust settling on your dashboard or other interior surfaces, or if you find yourself sneezing more often in your car, your filter might not be effectively capturing airborne particles anymore.
- Fogging Windows: A severely clogged cabin air filter can sometimes contribute to your windows fogging up more easily, especially in humid conditions, as it can affect the system's ability to dehumidify the air.
Don't wait until these symptoms become unbearable. Regular checks and timely cabin air filter replacement are essential for both your health and your vehicle's HVAC system. It's a key part of good Preventative Maintenance that saves you money and keeps you breathing easy.
Finding the Right Filter and Tools for the Job
Before you dive into replacing your cabin air filter, you'll need two main things: the correct replacement filter and a few basic tools. Don't worry, we're not talking about a full mechanic's toolkit here!
How Do I Find the Correct Cabin Air Filter for My Vehicle?
Finding the right filter is crucial, as filters vary significantly in size, shape, and even type depending on your vehicle's make, model, and year.
- Check Your Owner's Manual: This is always our first recommendation. Your vehicle's owner's manual will specify the exact part number or dimensions of the cabin air filter you need. It might also provide diagrams or instructions for its location.
- Use Online Lookup Tools: Many auto parts retailers and filter manufacturers (like FRAM or PUREFLOW) offer online lookup tools. You simply input your vehicle's year, make, and model, and they will show you compatible filters. Some even allow you to input your vehicle's registration number (rego number) for an exact match.
- Inspect the Old Filter: Once you remove your old filter, you might find the part number printed directly on its frame. This is a reliable way to get an exact match.
What Are the Benefits of Using a High-Quality Cabin Air Filter?
Not all cabin air filters are created equal! You'll typically find a few types:
- Standard Particulate Filters: These are the most basic and primarily designed to trap larger particles like dust, pollen, leaves, and bugs. They do a good job of protecting your HVAC system and reducing allergens. FRAM Fresh Breeze filters, for example, can keep up to 98% of road dust and pollen particles from entering a vehicle.
- Activated Carbon Filters (Charcoal Filters): These filters incorporate a layer of activated carbon or charcoal, which is excellent at absorbing odors, exhaust fumes, and harmful gases like carbon monoxide and sulfur dioxide. If you often drive in areas with strong smells or heavy traffic, a carbon-improved filter can make a big difference in air quality and comfort. PUREFLOW filters, for instance, boast a 4-stage filtration process that includes activated charcoal and sodium bicarbonate to neutralize odors.
- Antibacterial/Antiviral Filters: Some advanced filters feature special media designed to inhibit the growth of bacteria, mold, mildew, and even viruses within the filter itself. This can be particularly beneficial for allergy sufferers or those sensitive to airborne pathogens. PUREFLOW's advanced filtration technology, for example, includes antibacterial micro-technology that suppresses the growth of algae, mold, mildew, fungi, and bacteria on the filter.
While a basic filter will do the job, investing in a high-quality filter, especially one with activated carbon or antibacterial properties, can significantly improve the air quality inside your vehicle, making your drives around Buda, TX, much more pleasant.
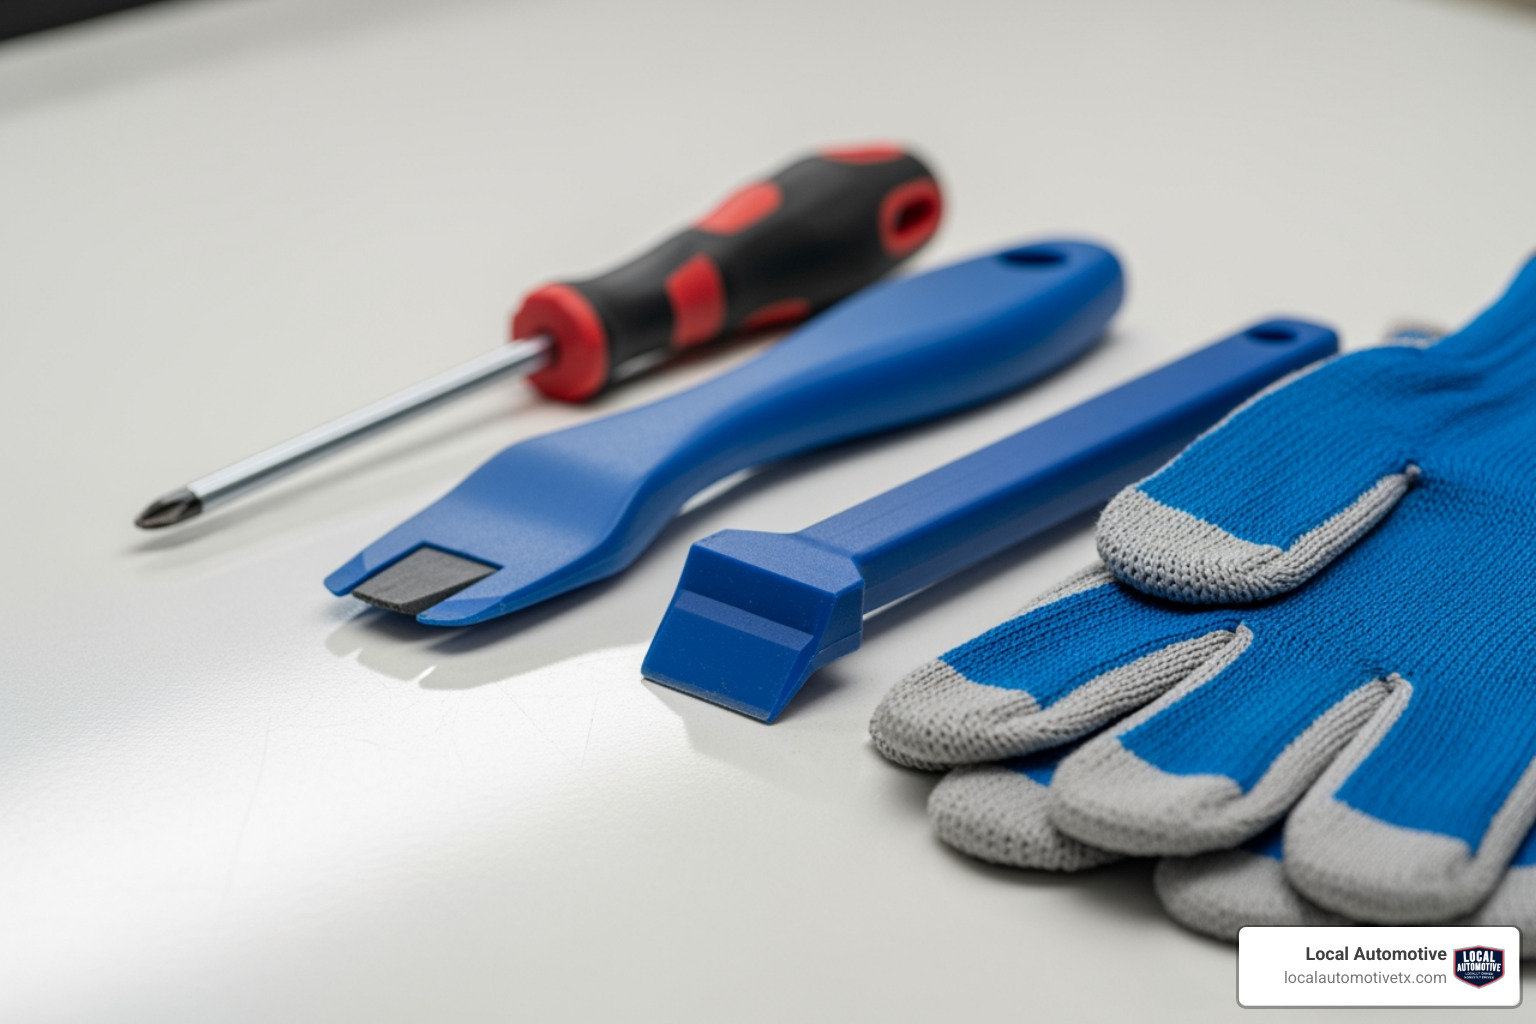
What Tools Are Needed to Replace a Cabin Air Filter?
The good news is that for most vehicles, cabin air filter replacement is a simple task requiring minimal tools. Here’s our list of essentials:
- Screwdriver or Socket Set: Depending on your vehicle, you might need a Phillips head screwdriver, a flathead screwdriver, or a small socket set to remove screws that secure the glove box or the filter housing cover. For some Tesla models, a T20 screw or T20/6mm hybrid fastener might be involved.
- Trim Removal Tool: These plastic pry tools are incredibly useful for carefully popping off plastic panels or clips without scratching or damaging your vehicle's interior.
- Flashlight or Headlamp: Many cabin air filters are located in dimly lit areas, like behind the glove box, so a flashlight will be your best friend.
- Gloves: Not strictly necessary, but they keep your hands clean, especially when handling a dirty, old filter.
- Vacuum Cleaner (preferably a shop vac): Essential for cleaning out the filter housing once the old filter is removed. You'll be amazed at the amount of leaves, dust, and debris that collects there!
- Replacement Cabin Air Filter: Of course! Make sure you have the correct one before you start.
That's it! No complex machinery or specialized equipment required.
Your Step-by-Step Guide to Cabin Air Filter Replacement
Now for the fun part: getting your hands dirty (or gloved!). Replacing your cabin air filter is a satisfying DIY project that most anyone can tackle. We'll walk you through the general process, but remember to always consult your specific vehicle's owner's manual for precise instructions.
Locating Your Vehicle's Cabin Air Filter
The first and sometimes trickiest step is finding the filter itself. The location of the cabin air filter can vary greatly from one vehicle to another, but there are a few common spots:
- Behind the Glove Box (Most Common): This is where you'll find it in a vast majority of cars, trucks, and SUVs. Access usually involves opening the glove box, removing its contents, and then either unlatching it to swing down further or removing a few screws to completely detach it. Once the glove box is out of the way, you'll typically see a small access panel or cover that holds the filter.
- Under the Dashboard (Passenger Side): In some vehicles, the filter might be located under the dash on the passenger side, requiring you to remove a kick panel or trim piece.
- Under the Hood (Engine Bay): Less common for modern vehicles, but some older models or certain designs might place the cabin air filter in the engine bay, often near the windshield cowl. This usually involves removing a plastic cover or cowl piece.
Safety First: Before you begin, ensure your vehicle's engine is turned off and the key is removed from the ignition. If you’re working under the hood, allow the engine to cool down to avoid burns.
Once you’ve identified the general location:
- Open and Clear the Glove Box: Remove everything from your glove box. This will make it easier to manipulate and prevent items from falling out.
- Remove the Glove Box (if necessary):
- Unlatch and Drop: Many glove boxes are held by simple clips on the sides. Gently squeeze the sides inward, and the glove box will likely unlatch and swing down, often resting on a hinge or a dampening strap. If there's a strap or wire, you might need to detach it. Don't be alarmed if it feels like it "falls" – it’s often designed to do that!
- Screws: Some glove boxes are secured with screws along the bottom or top. Remove these carefully.
- Hinge Release: For certain models, you might need to release a hinge along the bottom to fully remove the glove box.
- Locate the Filter Access Panel: With the glove box out of the way, you should see a rectangular or square plastic cover. This is the cabin air filter housing. It might have clips, small tabs, or a few screws holding it in place.
If you're unsure, don't hesitate to consult your owner's manual. It will provide specific diagrams and instructions for your vehicle. For a visual aid of typical filter access, you can check out A visual guide to filter access.
The Cabin Air Filter Replacement Process
Once you've gained access to the filter housing, the rest is straightforward:
- Remove the Old Filter: Unlatch or unscrew the filter housing cover and carefully pull out the old cabin air filter. Pay close attention to the direction of any airflow arrows on the old filter. This arrow typically points towards the rear of the vehicle or downwards, indicating the direction of air movement. You'll want to install the new filter in the same orientation. Take a moment to marvel at how much dirt, leaves, pollen, and general crud your filter has captured – it’s often a shocking sight!
- Clean the Housing: Before installing the new filter, take a moment to clean out the filter housing. Use your vacuum cleaner to suck up any loose debris, leaves, dust, or even small critters that might have accumulated. A quick wipe with a damp cloth can also help. Some guides even suggest using an air conditioning cleaner spray in the ducts to eliminate mold spores and bacteria, which can be a good idea for tackling persistent odors.
- Install the New Filter: Carefully insert the new cabin air filter into the housing, making sure the airflow arrow points in the correct direction (matching the old filter's orientation). Ensure the filter seats properly and snugly within the housing, without bending or creasing.
- Re-secure the Cover: Snap the filter housing cover back into place, ensuring any clips latch securely or screws are tightened.
Final Steps and Reassembly
You're almost done! Now it's time to put everything back together:
- Re-install the Glove Box: Reverse the steps you took to remove the glove box. If you detached a dampening strap or hinge, re-attach it. Ensure all screws are tightened and clips are securely fastened. Give it a gentle tug to make sure it's firm.
- Test the HVAC System: Turn on your vehicle and run the fan on various settings, both with AC and heat. You should immediately notice improved airflow and potentially a fresher smell. If you experience any unusual noises or reduced airflow, double-check that the filter is seated correctly and the housing cover is secure.
- Reset Maintenance Interval (if applicable): Some newer vehicles, particularly more advanced models like Teslas, have a digital maintenance summary that tracks filter life. If your car has this feature, you may need to manually reset the cabin air filter maintenance interval in your vehicle's settings.
Congratulations! You've successfully completed a cabin air filter replacement. You've not only saved some money but also ensured that you and your passengers are breathing cleaner, fresher air. It’s a small task with a big impact on your driving comfort and health.
DIY vs. Professional Service: What's Best for You?
We've shown you how straightforward a cabin air filter replacement can be. But the big question remains: should you tackle this yourself, or is it better to leave it to the professionals? The answer often comes down to a few key factors: cost, time, your comfort level with DIY tasks, and the complexity of your specific vehicle.
| Feature | DIY Replacement | Professional Service |
|---|---|---|
| Cost | $12 - $30 (for the filter itself) | $50 - $100+ (includes filter and labor) |
| Time | 5 - 15 minutes | 30 minutes - 1 hour (including check-in/out) |
| Difficulty | Easy to Moderate (depends on vehicle location) | Easy (for you!) |
| Tools Needed | Screwdriver, trim tool, flashlight, gloves | Specialized tools (if needed for complex access) |
| Confidence | Requires basic mechanical aptitude | Peace of mind, expert installation |
| Benefits | Cost savings, satisfaction, learning | Convenience, warranty, professional inspection |
Cost Considerations
- DIY Cost: The primary advantage of a DIY replacement is cost savings. You're only paying for the filter itself, which typically ranges from $12 to $30, depending on the brand and type (standard vs. carbon-improved).
- Professional Service Cost: When you bring your car to a shop for a cabin air filter replacement, you're paying for both the filter and the labor. This can push the total cost anywhere from $50 to $100 or more. While it seems like a significant markup for a simple task, you're paying for convenience, expertise, and the shop's overhead.
Time and Difficulty
- DIY Time: For most vehicles, changing a cabin air filter is a 5 to 15-minute job. Once you know where it is and how to access it, it's quick work.
- Professional Time: While the actual replacement might be quick for a professional, you need to factor in the time it takes to drive to the shop, check in, wait for the service, and check out.
- Vehicle Complexity: Most filters are behind the glove box, making them very accessible. However, some vehicles have more intricate designs, requiring the removal of more panels or components, which can increase the difficulty. If you're not comfortable with this, a professional service might be a better option.
Peace of Mind
For some, the peace of mind that comes with a professional handling their vehicle's maintenance is invaluable. A technician will ensure the correct filter is installed, that it's seated properly, and that all components are reassembled correctly. They might also spot other issues during their inspection.
At Local Automotive, we believe in honest and transparent service. We're happy to show you how to check your cabin air filter, and if you prefer for us to handle the cabin air filter replacement, we'll do so efficiently and affordably. We understand that regular car maintenance saves Buda drivers big money in the long run, and we're here to help you make the best choices for your vehicle. You can explore Why Regular Car Maintenance Saves Buda Drivers Big Money for more insights.
The choice is yours. If you're comfortable with basic car maintenance and have the time, a DIY cabin air filter replacement is a rewarding and cost-effective task. If you prefer convenience or your vehicle has a particularly tricky filter location, our team is always ready to assist. Check out Our full range of services to see how we can help.
Breathe Easy with Regular HVAC Maintenance
We hope this deep dive into cabin air filter replacement has demystified this often-overlooked but incredibly important maintenance task. Just like your own lungs, your car's lungs — the cabin air filter — need regular care to function optimally.
By regularly replacing your cabin air filter, you're not just performing routine maintenance; you're improving the air quality inside your vehicle, protecting your passengers from dust, pollen, and allergens, and keeping your HVAC system running. A clean filter means better airflow, fewer odors, and less strain on your car's heating and air conditioning system.
Whether you're a seasoned DIYer or prefer the convenience of professional service, knowing the importance of your cabin air filter helps you make informed decisions for your vehicle's health and your own comfort.
For expert help with your vehicle's Air Conditioning & Heating system in Hays County, TX, our team at Local Automotive is here to provide honest and reliable service. We're focused on our community values and straightforward dealings, with no hidden surprises for our local customers who need Buda car AC repair. Drive in and breathe easy!